Read The Essential Book of Fermentation Online
Authors: Jeff Cox
The Essential Book of Fermentation (30 page)
3 tablespoons organic plain yogurt with live cultures, at room temperature
1.
Empty the small pot (see above). Pour enough water out of the large pot so that when the small pot is put into it, the water reaches about halfway up the sides of the small pot. The small pot will want to float, so press it down so it touches the bottom of the large pot. Add the milk to the small pot. Its level in the small pot should be about equal to the level of the water on the outside of the small pot. Return the large pot with the small pot in it to the stove over medium heat. Clip the thermometer to the side of the small pot so the bulb end is in the milk and you can read the temperature.
2.
Keep the water in the large pot boiling and stir the milk frequently to keep the temperature evenly distributed. Meanwhile, put a stopper in your kitchen sink and add enough cold water so that it will reach about halfway up the small pot when you cool it later in the process. Add a couple of trays of ice cubes to the cold water.
3.
When the milk reaches 185ºF, it will begin to look frothy. Don’t let it boil or overheat or you will ruin the milk for making yogurt. As soon as 185ºF is reached, transfer the small pot to the sink. Don’t let the cold water go higher than halfway up the sides of the small pot. Turn off the heat under the large pot. Stir the milk occasionally and continue to read the temperature. When it cools to 110ºF, add the 3 tablespoons yogurt and stir well to incorporate. Put on the lid. Remove the small pot from the cold water.
4.
Place a heating pad on a large cutting board and plug it in. Set the heat to medium. Dry the bottom of the small pot with a dish towel and set it on the heating pad. Cover the small pot and lid with a dish towel. (If you have a gas oven, the pilot light might give enough warmth. A temperature of 100ºF is optimal. Check it with an oven thermometer. Few electric ovens have a setting as low as 100ºF.)
5.
Wait 7 hours without inspecting or stirring or in any way disturbing the milk.
6.
At 7 hours, remove the towel and lid and taste the young yogurt. This is your baseline for taste. If it’s as tangy as you like yogurt, then you’re home free. If it’s too tangy, knock an hour off the wait time for your next batch. If not tangy enough, let it go for 8 hours next time. It gets sourer the longer it sits.
7.
You’ll see that the milk has curdled, it has a pleasant cheesy aroma, and there may be some greenish whey on top. This is all normal. Use a clean spatula to stir the curds and whey vigorously so they are well incorporated into any remaining liquid. If the yogurt seems thin and runny, that’s normal at this stage. It will thicken up in the fridge.
8.
Pour the yogurt into the half-pint jars, leaving ½ inch head space. You can also use clean plastic yogurt containers that you’ve saved, or any other glass, ceramic, or food-grade plastic containers.
9.
Put the lids on your containers and place them in the coldest part of the fridge. Chill overnight. The next day, they’ll be the yogurt you’re familiar with—only better. Add fresh fruit or use it plain on granola or in any other way you like yogurt. Your batch will last for 2 to 3 weeks. Be sure to reserve 3 tablespoons of this batch to start your next batch.
Greek Yogurt

Greek yogurt is simply regular yogurt that has been drained to remove most of the whey. It results in a thick, protein-rich yogurt that has become popular on its own and is used in many dishes the way sour cream is used, as in Greek specialties like tzatziki and Indian dishes such as raita and lassi.
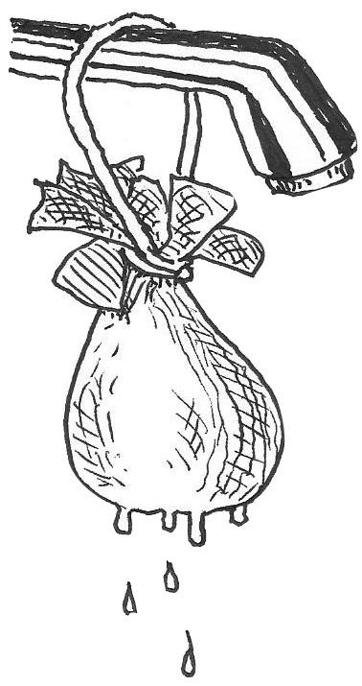
Figure that you’ll lose half the volume of regular yogurt when making Greek yogurt, and maybe a little more than half if using fat-free milk. So if you’re starting with a batch of yogurt using the 2-quart recipe above, you’ll end up with 1 quart (2 pints or 4 cups) of Greek yogurt.
- Have on hand: fresh, clean cheesecloth; a colander; butcher’s string; a medium bowl. Make sure the colander fits in the bowl so it doesn’t touch the bottom.
- Line the bowl with 2 or 3 or even 4 layers of cheesecloth. Dump the yogurt into the cheesecloth and then draw up the 4 corners of the cloth and hold it over the sink. Twist the corners to put pressure on the bag, forcing out as much liquid as you can.
- When most of the liquid has drained, it will drip more slowly. Now tie off the gathered ends just above the mass of yogurt with string. You can put this in the colander in the bowl to continue draining. Some people dispense with the bowl and colander and simply hang the cheesecloth bag from the faucet in the kitchen sink.
- Let the bag drain for 2 to 3 hours, then place the bag in the sink. Don’t remove the string. Using your palms, press the bag to remove remaining liquid. When you’ve pretty much got it all, open the bag and with a spatula, turn the yogurt—now about the consistency of sour cream—into a clean storage container, cover it, and place it in the fridge. Let it rest 4 hours or overnight before using, and use it up within 4 to 5 days. Three tablespoons of this makes a good starter for your next batch of yogurt.
Mayonnaise Made with Whey
It certainly is easier buying a jar of Hellmann’s or Best Foods at the market, but you really don’t want that conventional food with all its additives, do you? Especially when mayonnaise is so simple to make at home, and so charged with beneficial bacteria when you make it with whey. If you already make kefir or yogurt, simply drain them through cheesecloth to get the liquid whey. Most mustard is made with vinegar, giving mayo a bit of tang. Here we add whey for its sour nuance and its beneficial bacteria.
Makes about 2½ cups
3 egg yolks, at room temperature
1 tablespoon freshly squeezed lemon juice
½ teaspoon sea salt
¼ teaspoon American yellow mustard
1½ cups extra-virgin olive oil
3 tablespoons whey
1.
In a bowl, whisk the yolks until they turn a light lemon yellow color.
2.
Add the lemon juice, salt, and mustard and whisk until well incorporated.
3.
Transfer the yolk mixture into a blender. Run the blender on medium-low speed and add the oil a few drops at a time to begin with. Adding too much oil too quickly yields thin mayonnaise. When the mixture thickens to the consistency of heavy cream, add the remainder of the oil in a very slow, thin stream. Easy does it.
4.
When the consistency is that of mayonnaise, add the whey and blend it in thoroughly.
5.
Transfer the mayonnaise to a jar with a lid and set it on the kitchen counter for 3 hours, then refrigerate. Use within 2 to 3 weeks.
Making Your Own Organic Cheese
Cheesemaking is fun and easy—if you have good milk to start with. The quality of the raw material is crucially important. You can make cheese from pasteurized and homogenized store milk, but it will not make as flavorful and interesting a cheese as will raw milk fresh from the animal. On the other hand, if you are curious about cheesemaking and want to give it a try, you may find it cheaper and easier to practice with store milk until you feel you have learned the essentials. And, because you made it yourself, it won’t be bad at all.
Once you’ve learned the how-to, get in contact with suppliers of organic milk in your region. Cow’s milk will be the easiest to find, goat’s milk less so, and sheep’s milk is at such a premium with cheesemakers that it may be hard to find any for sale. Of course, the best way to have a supply of raw, organic milk at your disposal is to have your own animals. That may or may not be possible for you, but in any event, keeping milch animals represents a real commitment of time and energy. There are no two-week vacations for folks who have to milk the goats twice a day, seven days a week.
To make a fine cheese, you’ll need a source of starter culture, coagulant, and depending on the type of cheese you want, mold cultures, aroma-developing cultures, annatto color, lipase flavor enzymes, or other materials. Fortunately, all these products are available from Dairy Connection, Inc., 8616 Fairway Place #101, Middleton, WI 53562. I suggest writing for their catalog, which explains which cultures are used to make the various types of cheese. You can also peruse their products online at www.dairyconnection.com.
Rather than starting with the fancy equipment that cheesemakers use—perforated plastic draining baskets and so forth—we’ll walk through the steps of simple cheesemaking using ordinary kitchen equipment. If you develop a passion for the craft, there will be time enough to move up to more expensive and dedicated equipment and materials.
First, make sure all your equipment is thoroughly clean. Use stainless-steel or food-grade plastic containers, such as those Rubbermaid makes. Have a supply of cheesecloth on hand. You’ll need what’s called a mesophilic starter culture that contains
Lactococcus lactis
subsp.
lactis
and
Lactococcus lactis
subsp.
cremoris.
Dairy Connection sells 20 units minimum (enough for 1,000 pounds of milk) for about $6. Rennet tablets for small batches are available at most supermarkets, usually the Junket brand, or you can buy coagulants through Dairy Connection. The starter culture suffuses the milk with bacteria that will ripen the cheese after it’s made—its function is not to make curds. The coagulant causes the milk to make curds. Starter is sold as units, but people who don’t want to get that technical can use the alternatives I list below.
Let’s start with a small batch—say 2 gallons of milk—of what we hope will become something like a Colby or mild cheddar. Your milk should be at room temperature—ideally about 70ºF. Add about a tenth of a unit of starter culture for 2 gallons of milk. In lieu of starter culture, you can practice your cheesemaking with buttermilk (½ cup for 2 gallons of milk), or with
Lactobacillus acidophilus,
available in liquid culture form at any health food or organic food store. Acidophilus won’t make the kind of sincere little artisanal cheeses you’re really after, but it will add some acid and help make a decent cheese. Use 1 cup of yogurt for 2 gallons of milk, or use 2 gallons of acidophilus milk to begin with. Allow the milk and culture mixture to stand at room temperature overnight.
Now add the coagulant. If you use rennet tablets, follow the directions on the package, but it’s usually half a tablet for 2 gallons of milk. If you use lemon juice, it will take longer to coagulate and the curd won’t be as firm. Don’t go to the expense of chymosin coagulant until you’re making large batches of cheese. The milk should be warmed to between 75 and 100ºF during the coagulating period—closer to 100ºF is better, but no higher. You can set your cheesemaking bowl into a larger bowl of warm water to maintain the temperature. After half an hour to an hour, test the milk to see if the curd has set and you get a clean break. Insert a finger down into the curd and lift. The curd should part cleanly and clear whey should appear in the break. The set may take up to 2 hours. This whey can be used within a week or two if kept in the fridge or up to 6 months if frozen. It’s the required ingredient in
whey mayonnaise
and
ricotta
, as well as many other probiotic recipes.